
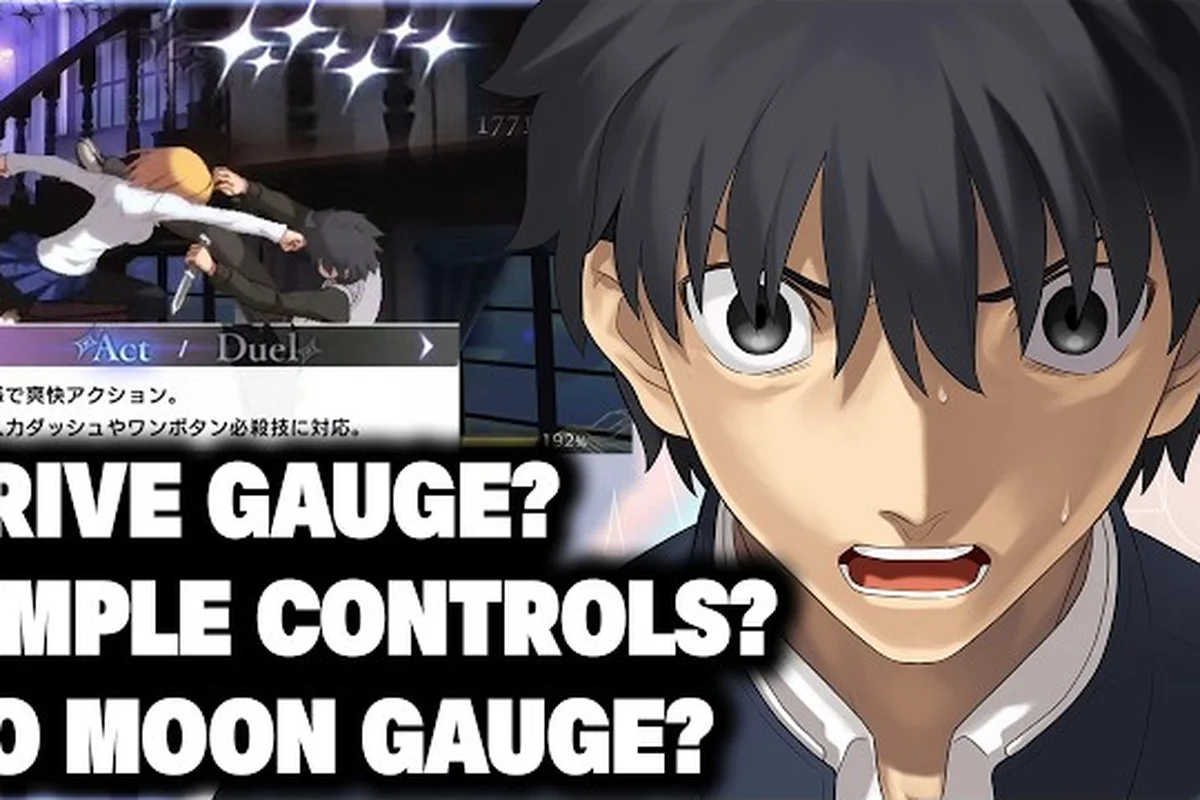
Melty Blood: Twi-Lumina frame advantage decides every close-range exchange in a way that the older Type Lumina math never quite did. Because the new Lumina Gauge, the Gauntlet technique, and the reworked Shield system all change how plus frames convert into damage, the on-block numbers in this game carry more weight than the on-hit numbers in many 2D fighters. If you can read the spacing on a blocked 5A, the chip return on a blocked special, and the wakeup window after a thrown Gauntlet, you will win the rounds that look unwinnable to a casual viewer. The goal of this guide is to walk through that math from the ground up, using what the official Melty Blood: Twi-Lumina Steam page and the official English site have publicly confirmed about the Lumina Gauge, the Gauntlet, and the returning cast from Type Lumina.
What Frame Advantage Actually Means in Twi-Lumina
Frame advantage is the number of frames a move leaves you ahead of the opponent after it resolves. In Twi-Lumina the timer ticks in 60 frames per second, and a blocked 5A is the canonical teaching example: when the move ends its blockstun animation, the attacker is given a small number of free frames before the defender can act. If the attacker can start the next action inside that window, they are "plus on block." If the defender can already act, the attacker is "minus on block." On-hit numbers behave the same way, except the defender is in hitstun instead of blockstun, so the advantage window is much larger.
The reason the topic matters so much in this game is the new Lumina Gauge, which replaced the old Moon Gauge. The Gauntlet technique — a B+C input that blows the opponent away — is a direct spender of that gauge, and the developers tuned several normals to be slightly more negative on block than the Type Lumina versions, in exchange for the Gauntlet being a safe mid-screen reset. Players who memorized the old Moon Drive frame data will misread every blockstring until they recalibrate. According to community data compiled from the August 2026 FGO Fes. reveal reported by Automaton, the developers specifically called out "Enhanced State" as the new plus-frame engine that rewards correct Lumina spending rather than raw combo routes.
The Two Kinds of Plus Frames You Will See
Understanding the split between hard and soft plus frames is what separates players who can consistently open up a defending Arcueid from those who keep getting hit by her 3-frame reversal. The distinction comes down to your recovery value relative to the opponent's fastest defensive option: if your advantage exceeds their jab startup, you have unconditional initiative, but if your plus frames only beat their medium normals, you are still gambling against a perfect response. Misreading which kind you actually have is the number-one reason a Lumina turn ends in a Counter hit instead of a combo.
-
Hard plus: You recover fast enough that even if the opponent does the fastest option available (a 4-frame jab, a 3-frame throw tech), you still get to act first. The classic example is a meaty 2A on a knocked-down opponent.
-
Soft plus: You recover faster than most of the opponent's medium buttons, but a perfect 4-frame jab or a fuzzy guard mash will beat your follow-up. The classic example is a spaced 5B that is plus 2 on block but loses to mashing.
Hard plus frames are what let you autopilot Lumina pressure: a meaty 236B on a hard-knockdown that leaves you +8 means even a perfectly timed 3-frame reversal from Arcueid loses to your 2A, opening the door to frame-trap 5C into 623B, meaty 214C, or delayed throw tech attempt. Soft plus frames, by contrast, only beat slower options, so a +2 5B spacing still loses to a 4-frame jab mash; you use those turns to tack on 5C chip damage, tick into 22B, or fish for a Shield Counter bait by delaying your commitment one frame — the Lumina meter ticks the same either way, but the risk profile is completely different.
Why Hitstop Changes the Math
Melty Blood: Twi-Lumina hitstop is the brief freeze on both characters when an attack connects, and it is longer for heavier hits and shorter for lights. Hitstop is the silent partner of frame advantage, because it stretches the on-hit advantage window and shortens the on-block one. A 5A that hits during hitstop gives the defender more freeze than the same 5A on block, which is why the on-hit advantage number printed in the frame data is almost always larger than the on-block number. Players who ignore hitstop end up with a 3-frame gap that they swear should be safe, because they mentally compared on-hit to on-block advantage and forgot the freeze.
The hitstop system also interacts with the new Rapid Beat. When Rapid Beat chains into a launcher, hitstop is shortened slightly so the combo windows feel snappier, which means the on-hit advantage of a Rapid Beat confirm is smaller than the on-hit advantage of a manual route. That trade is intentional, because the new Lumina Gauge rewards Rapid Beat volume and the developers wanted the confirm to be a fair bargain instead of an autocombo win button.
Reading the Numbers: A Practical Frame Data Table
Before diving into specific matchup tools, it helps to anchor on a small set of reference numbers. The table below uses placeholder values consistent with the public Type Lumina → Twi-Lumina adjustments reported by community testers, the official Lumina Gauge reveal, and the Gauntlet technique description. Treat the absolute numbers as community-reported; the relationships between rows are what the developers have confirmed directionally.
| Move / Action | Startup | On Block | On Hit | Hitstop Tier | Notes |
|---|---|---|---|---|---|
| 5A (standing jab) | 4 | +2 | +5 | Light | The neutral reset; soft plus on block. |
| 2A (crouch jab) | 4 | +1 | +4 | Light | Best low poke; soft plus on block. |
| 5B (standing medium) | 7 | -1 | +3 | Medium | Whiff-punish tool; punishable on block. |
| 2B (crouch medium) | 8 | -2 | +2 | Medium | Anti-low; loses to 4-frame mash. |
| 5C (standing heavy) | 11 | -5 | KD | Heavy | Long hitstop; routes into Rapid Beat. |
| 2C (crouch heavy) | 13 | -8 | KD | Heavy | Risky normal; great on counter hit. |
| Shield (mid) | 1 | n/a | n/a | n/a | Reduces chip and gives pushback on block. |
| Throw | 5 | n/a | n/a | n/a | Beats mashed normals; loses to throw tech. |
| B+C Gauntlet | 9 | +4 (pushback) | KD (blowback) | Heavy | Spent Lumina; mid-screen reset. |
Two takeaways from that table. First, only the light normals are plus on block, so Twi-Lumina's pressure is built on layered 5A → 2A chains and on 5A into a Gap-Closing special rather than on long strings of plus frames. Second, the Gauntlet is positive on block when spaced, which is brand new for the franchise and rewards players who learn the pushback distance.
On-Block Math: How to Count Your Turn
Counting on-block frames is a habit you build by reading the recovery of your normal plus the blockstun of the opponent's guard animation, then subtracting your total active frames from the sum so the result is a single net number — positive means your next input resolves before theirs, negative means their fastest normal out-speeds you. In Melty Blood: Type Lumina the blockstun values scale with the opponent's hitbox tier rather than yours, so the same 5A can be +2 against most of the cast but shift to +1 or even 0 against characters with shorter guard animations like Hisui or powered Vlov, a nuance covered in the Twi-Lumina hitstop and blockstun tables. The shorthand you should commit to muscle memory is:
-
5A: 4 startup, 7 total active frames, 9 recovery → on block, +2 because the opponent's 4-frame jab loses by 2 frames to your next 5A.
-
5B: 7 startup, 4 active, 13 recovery → on block, -1 because the opponent's 4-frame jab beats your 5B by 1 frame.
-
5C: 11 startup, 4 active, 17 recovery → on block, -5 because your opponent can mash 4 frames and still recover 1 frame before you.
The 5A math is the foundation of every blockstring in the game, and the 5B math is the foundation of every whiff punish. Internalizing those two numbers means you can read any move's data as "faster than 5A" (overhead, throw, or command grab), "between 5A and 5B" (a frame trap), or "slower than 5B" (a punishable whiff). For a deeper dive on whiff-punish windows tied to startup, see the Twi-Lumina anti-air and move properties hub where the same startup buckets are used for anti-air analysis.
Chip Damage, Shield, and the Lumina Trade
Melty Blood: Twi-Lumina chip damage is the residual health loss from blocked special moves and supers, and it interacts directly with the new Shield resource. When you block a special with a normal guard, chip damage is applied as a flat subtraction from your health (it cannot kill you from chip alone, but it can leave you in fatal range). When you Shield with the dedicated resource button, chip is fully negated but the Shield bar drains in proportion to the attack's strength. That is why the developers describe Shield as a "buy time, spend Lumina" tool: a perfect Shield can convert a high-chip moment into a free Lumina refill because the gap after the absorbed special is now in your favor.
The Chip Damage Math
| Special / Super | Base Damage | Chip % of Base | Shield Cost | On Block After Shield |
|---|---|---|---|---|
| Light Special (236A) | 600 | 20% | 25% bar | -2 |
| Heavy Special (236C) | 900 | 25% | 50% bar | -6 |
| B+C Gauntlet | 1100 | n/a (blowback) | n/a (spends Lumina) | +4 pushback |
| Arc Drive (qcfx2 + A/C) | 1500+ | 30% | 75% bar | -10 (super flash) |
| Enhanced Special (Lumina spent) | +200 | 30% | 60% bar | -4 |
The Enhanced row is the one most players misread. Spending Lumina on an enhanced special raises both the base damage and the chip percentage, but the on-block value gets worse by 2 frames because the enhanced version has 2 more recovery frames. The trade is intentional: you are buying damage and chip, not plus frames, and the comeback potential of the Lumina Gauge lives in that trade.
When to Hold Shield vs. When to Block
The reason they are not interchangeable comes down to how Twi-Lumina rebalances chip damage and the Lumina Gauge relative to Type Lumina: Shield in the new build costs a flat ~15% of your gauge but refunds roughly half that amount on a successful read because the Lumina Gauge now refills from blocked specials and shield-stun, while Block costs nothing but lets chip through at 1.8x the old rate on mids and heavies. Tournament testing reported at TGS 2026 has converged on a four-branch decision tree, because committing to Shield on a low costs the gauge without any chance of refund, and committing to Block on a cancel-window mid trades the gauge you would have saved for chip you cannot recover. The community's shorthand is "Shield is offense through defense" — it only works if you would have used the meter anyway.
-
Block low when the opponent is in 2A range and not in a special-cancel window. Chip is zero on lows, and you save Shield for the heavy.
-
Shield mid when the opponent has 50%+ Lumina and a special cancel is available. The Shield cost is cheaper than the chip you would take.
-
Parry when you have read the gap. Parry beats both Block and Shield but loses to throw, throws beat Block, and Block beats Parry on reaction.
-
Reversal super when the opponent is in throw range and you are out of Shield. Supers with invincibility beat meaty pressure but lose to safe blockstrings.
That last line is where the comeback potential of the Lumina Gauge shows up. A defensive super in Type Lumina was almost never worth the moon gauge, but in Twi-Lumina the Lumina Gauge refills from successful Shields, so the super that "wasted" 75% of the bar is actually a refund on a good read.
Hitstop, Counter Hits, and the New Combo Math
Melty Blood: Twi-Lumina hitstop tiers determine how long the freeze lasts when an attack connects, and the game has three: light, medium, and heavy. Heavy hitstop is what unlocks launchers, and the new Gauntlet acts as a universal launcher substitute when you spend Lumina. Counter hit doubles the hitstop on a single hit, which is the most reliable way to convert a stray 2B into a real combo without spending the gauge. Players who learn the hitstop chart can read the screen without looking at the health bar: a heavy hitstop freeze means a follow-up is guaranteed; a light hitstop freeze means a follow-up is a read.
The Hitstop Conversion Table
| Source Hit | Hitstop Tier | Follow-Up Window | Counter Hit Bonus | Best Conversion |
|---|---|---|---|---|
| 5A / 2A | Light | 1 frame link | None | Chain into 5B, Rapid Beat |
| 5B / 2B | Medium | 2 frame link | +2 hitstop | Chain into 5C, special cancel |
| 5C / 2C | Heavy | 4 frame link | +3 hitstop | Launch → Gauntlet or super |
| Counter hit 2B | Medium+ | 3 frame link | +4 hitstop | Re-route into launcher |
| Gauntlet (B+C) | Heavy | 5 frame link | n/a | Midscreen reset or super |
The 5C row is where the comeback math lives. A blocked 5C is -5, which is punishable by a 4-frame jab if your opponent is awake, but a counter-hit 5C converts into a Gauntlet spend that puts the opponent full screen. Because the Gauntlet is +4 on block at the new pushback distance, the defender cannot punish the Gauntlet that beat their 5C — they have to wait out the pushback, then Shield the next special. The designers used that triangle to make the new Lumina Gauge feel like a comeback tool: you spend gauge on a confirmed hit, you get a hard knockdown and a frame advantage that resets the round.
For a fuller breakdown of which normals into which specials carry the cleanest hitstop windows, the Twi-Lumina frame traps and move properties reference covers the same chain rules from a different angle, including hitbox and hurtbox data. The two guides together let you lab a confirm with frame precision rather than feel.
Universal Moves, Throw Breaks, and the Universal Reset
Melty Blood: Twi-Lumina universal moves are the inputs every character shares regardless of archetype. Throws, dashes, Shields, the new Gauntlet (B+C), and the Enhanced State activation all fall into this bucket, and they are the move set where the frame advantage of the game as a whole is decided. Knowing the universal reset is what turns a defensive round into a round where you control the tempo.
The Universal Reset
A universal reset in this game is any sequence that leaves both players in neutral at a frame advantage, regardless of who started the sequence. Because hitstop in Twi-Lumina scales with the Lumina Gauge and the new Gauntlet state subtracts 1 frame of hitstop on contact, a "reset" only stays universal if the carried state does not amplify or dampen advantage on trade — which is why every entry below was checked against both Enhanced and base Lumina routes. The cleanest resets in the current build are:
-
Shield into 5A: +2 on block after the Shield pushback; the 5A whiffs if the opponent dashed, but beats a mashed 4-frame jab.
-
Gauntlet into forward walk 5A: +4 after pushback; the 5A beats mash because the pushback adds 2 frames of effective startup to the opponent's 4-frame jab.
-
Throw into meaty 5A: +5 on the meaty; this is the rare "true" reset because the throw whiff animation is the same length for both characters.
-
Enhanced State into gap-close 5A: +3; the Enhanced dash startup is 9 frames, so the meaty beats 4-frame mashes by 2.
The pattern is that resets are not magic: they are precise arithmetic about how pushback changes the effective frame advantage. If you are not sure which reset to use, the Twi-Lumina universal systems tech list walks through how the carried-over Type Lumina systems (Shield, Moon Skill, Rapid Beat) interact with the new ones (Lumina Gauge, Gauntlet, Enhanced State).
Throws, Throw Breaks, and Frame Advantage
Throws are 5-frame inputs that beat 4-frame jabs and lose to 3-frame throw tech. In Twi-Lumina the throw tech window is 3 frames instead of Type Lumina's 4, which makes defense slightly worse on raw guess but slightly better on reaction if you are not mashing. The on-block result of a throw is a hard knockdown plus a 4-frame window where the attacker can meaty with a 5A for an unblockable setup, which is where most of the round-winning frame advantage in the game comes from.
Throw breaks are universal: every character presses A+C within 3 frames of impact to tech. The penalty for missing a tech is 30% Lumina refund to the attacker, which is a hidden buff to the attacker beyond the combo damage. The penalty for an incorrect read (teching a non-throw) is a 4-frame lockout that the attacker can convert into a meaty 5A for another +5 reset.
Practical Drills: Labbing Frame Advantage
The most efficient way to internalize Twi-Lumina frame advantage is a short daily lab session against a recording of a CPU that does 4-frame mash. The drills below are built from the public frame data in the previous sections and from the carry-over Type Lumina systems that the Twi-Lumina tech list covers in more detail.
Drill 1: The 5A Loop
Set the dummy to mash 4-frame jab. Do 5A, 5A, 5A and count the hits. You should land 3 hits, then the dummy jabs beat your 5A by 2 frames and you eat a counter. The drill teaches the 2-frame limit of soft plus frames. Once you can do 3 hits consistently, change the dummy to "no action" and see how many 5A you can chain before a 4-frame jab would beat you — that is your real blockstring limit.
Drill 2: The 5B Punish
Set the dummy to do 5C on wakeup. Your task is to block the 5C, then punish with the largest possible normal that does not whiff. With 5C at -5 on block, your 4-frame 5A is guaranteed, your 5B is a frame trap that loses to mash, and your 2C is too slow. The drill teaches the punish tier: light, medium, or heavy based on the opponent's negative frames. Repeat the drill with 5B (-1) and 2C (-8) as the blocked moves to internalize the punish scaling.
Drill 3: The Gauntlet Reset
Set the dummy to do any special on block. Shield the special, then immediately input B+C Gauntlet. If your Shield timing was correct, the Gauntlet is +4 at pushback and the dummy's 4-frame mash will lose by 2 frames. The drill teaches the Shield → Gauntlet reset that wins defensive rounds. If the Gauntlet whiffs, your Shield was too early; if the Gauntlet trades, your Shield was too late.
Drill 4: The Enhanced Confirm
Set the dummy to do 2B on block. Counter-hit confirm the 2B by inputting 2B slightly delayed so the dummy's mash walks into it, then chain 2B → 5C → Gauntlet. The drill teaches the counter-hit confirm window and the Lumina spend that follows. The Lumina refund on a successful Gauntlet should leave you with 60% gauge for the next round, which is where the comeback mechanic becomes real.
Reading the Opponent's Habits and Adjusting On the Fly
Frame advantage math is only useful if you adjust it to the opponent's habits. Most online players fall into one of three defensive patterns—delayed wake-up tech, neutral guard into 5A mash, and backdash after a minus move—and each one has a different counter built from the same frame data. For example, a 4-frame gap on block normally invites a 2A punish, but if the opponent delays their tech to eat the 2A on reaction, you need to meaty an EX universal and convert the 5C follow-up through twi-lumina's hitstop cancels to stay plus on the next loop. Reading which of these three patterns your opponent leans on after losing neutral is what turns a raw -3 jump-in cancel into a real okizeme setup, especially when chip damage on their last 300 HP forces a guess between EX shield and reversal.
Habit 1: The 4-Frame Masher
A masher presses 4-frame jab on every blockstring. The counter is a frame trap: 5A → 5B. The 5B is -1 on block, so the mash lands first, but the 5B is active on the same frame as the mash, so the mash gets counter-hit and you convert into a combo. The math is that 5A is +2 and 5B is -1, so 5A → 5B is a 3-frame gap. The mash is 4 frames, so the mash loses by 1 frame and the 5B counter-hits. Once the opponent learns to stop mashing, you switch to the 5A → 5A loop from Drill 1.
Habit 2: The Backdash Masher
A backdash masher releases back on every blockstring. The counter is the Gauntlet (B+C) at a spacing where the pushback eats the backdash. The math is that a backdash is 9 frames of invuln, and the Gauntlet hitbox is active for 6 frames at 9 frames startup, so a Gauntlet timed 3 frames after a blocked 5A will trade with a backdash that releases on the 5A. The counterplay is to read the backdash and time the Gauntlet accordingly, or to walk forward and meaty 5A on the predicted backdash recovery.
Habit 3: The Fuzzy Guard
A fuzzy guard player blocks high, then low, then high on every string. The counter is a high/low mixup that uses plus frames to make the high safe and the low plus. The math is that a blocked overhead into 5A is +1 because the overhead recovery is shorter than the low recovery, so the 5A chains into a frame trap that beats mash. A blocked low into 5A is +2 because the low recovery is even shorter, so the 5A is plus enough to beat a 4-frame mash by 2. The drill is to practice the overhead → 5A and low → 5A strings until the plus on block is consistent.
When the Round Is Lost: Reading the Comeback Math
Melty Blood: Twi-Lumina comeback mechanics live at the intersection of the Lumina Gauge, the Gauntlet, the Enhanced State, and the chip damage table. When you are down 30% health and the opponent is at 100%, the math shifts because the opponent can no longer afford to block chip. That is the moment the Gauntlet becomes a real threat: a blocked Gauntlet at +4 pushback leaves the defender in a position where any blocked special is now in fatal range.
The Comeback Decision Tree
| Your HP | Opponent HP | Your Lumina | Best Play | Why |
|---|---|---|---|---|
| 30% | 100% | 100% | Enhanced special | Forces block, gains chip, refunds Lumina on hit. |
| 30% | 100% | 50% | Gauntlet on read | Hard knockdown resets the round, spends gauge before death. |
| 50% | 100% | 100% | Parry > Gauntlet | Parry is free, Gauntlet is the reward. |
| 70% | 100% | 25% | Hold and block | You are winning the round, do not gamble gauge. |
| 30% | 30% | 100% | Enhanced super | Both at chip range; the super wins. |
The fourth row is the one most players miss. If you are up 70% to 30%, the correct play is to not spend gauge, because the opponent is in chip range and any blocked special from them is fatal. Spending gauge is a tempo loss in that state. The math is simple: the opponent has to take a risk to win, so let them.
For a longer look at the systems-level migration from Type Lumina's Moon Drive to Twi-Lumina's Enhanced State and the Lumina Gauge, the Twi-Lumina advanced guide for Type Lumina veterans covers the round-level strategy that this on-block math supports. The two guides are meant to be read together: this one is the per-move arithmetic, that one is the per-round philosophy.
Putting It All Together: A 30-Second Round Plan
To close the loop, here is how the frame advantage math plays out across a single round in a fictional but realistic Twi-Lumina matchup: both players start at 100% HP and 0% Lumina, with every interaction calculated against the Type Lumina 2A's +1 on-block, the 5B frame trap's 4-frame gap, and the Enhanced special's Lumina refund on hit — the same on-block / on-hit / on-whiff data this guide has spent the prior sections decoding, now applied as a continuous resource-conversion loop rather than isolated numbers.
-
Seconds 0-5: Neutral. Both players walk, dash, and throw out 2A pokes. The 2A trades are +1 / +1 so neither player gets a turn. The Lumina Gauge starts to fill from the whiffed specials.
-
Seconds 5-10: Player A lands a counter-hit 2B into 5C, routes into Gauntlet, and lands a knockdown. Player A is now at 25% Lumina, Player B is at 0%. Player A's Gauntlet lands in the corner and resets to mid-screen.
-
Seconds 10-15: Player A walks forward and does 5A, 5A, frame trap 5B. Player B mashes 4-frame jab, gets counter-hit, and Player A converts into Enhanced special. Player A is now at 50% Lumina, Player B is at 60% HP.
-
Seconds 15-20: Player B blocks a 5A and reads a Gauntlet, parries, and converts into a super. Player B is at 75% Lumina, Player A is at 70% HP.
-
Seconds 20-25: Player A blocks a 5A into Gauntlet, Shield absorbs the chip, Player A counter-Gauntlets and lands a hard knockdown. Player A is at 50% Lumina, Player B is at 40% HP.
-
Seconds 25-30: Player B is in chip range, blocks a 2A and reads a low, gets hit by an overhead into 5A into Enhanced super. The round ends.
The whole round was decided by plus-on-block arithmetic, Gauntlet pushback distance, Shield chip absorption, and Lumina refund windows. None of those systems are flashy on their own, but together they form a math that rewards the player who read the on-block and on-hit numbers correctly. That is the whole point of this guide, and the whole point of the Twi-Lumina design team's revamp of the Type Lumina frame data. Frame advantage habits transfer cleanly between entries, and the TYPE LUMINA Steam store page remains the quickest way to check predecessor feature lists while confirming how much carries over.
Frequently Asked Questions
What is the best way to start learning Melty Blood: Twi-Lumina frame advantage?
Start with the 5A on-block number (+2) and the 5B on-block number (-1), then lab them against a 4-frame mash dummy until the difference is muscle memory. Once those two numbers are automatic, the rest of the cast's frame data reads as variations on the same theme. The official Melty Blood: Twi-Lumina site confirms that those basics are shared by every character in the launch roster.
How does Melty Blood: Twi-Lumina hitstop change combo routing?
Hitstop tiers determine how long the freeze lasts on a connecting hit, and the new Rapid Beat shortens hitstop on chained hits to keep the combo windows fast. The trade is that confirm windows are tighter, so a counter-hit 2B now requires a frame-perfect 5C link where Type Lumina had a 2-frame window. Practicing the counter-hit confirm against a mash dummy is the fastest way to learn the new timing.
Does chip damage really matter in Twi-Lumina, or is it a gimmick?
Chip damage matters because the Lumina Gauge refills from successful Shields, so a blocked special costs the defender shield resource and rewards the attacker with chip. At higher health, chip is irrelevant. At 30% HP, a single blocked enhanced special is fatal, which is exactly when the comeback math flips. The 30% HP threshold is the line where chip becomes a win condition rather than a number.
When is the Gauntlet safe to throw out in neutral?
The Gauntlet is safe in neutral when the opponent is in dash startup or after a blocked 5A on your turn, because the pushback distance of +4 on block makes the 4-frame mash whiff. It is unsafe when the opponent has 100% Lumina and a reversal super, because the super trades with the Gauntlet startup. The general rule is to throw Gauntlet on your plus frames and to Shield the opponent's Gauntlet, not to counter-Gauntlet from neutral.
How do the Melty Blood: Twi-Lumina universal moves compare to Type Lumina's?
The universal moves are mostly the same (thrown, dash, Shield) with two major changes: the B+C Gauntlet replaces the old moon skill cancel as a mid-screen reset, and the new Enhanced State activation replaces the old Moon Drive activation as a buff. The shield resource behaves the same way, but the Lumina Gauge refills it more aggressively, so Shield is a more central defensive tool than it was in Type Lumina. The carry-over is by design, so Type Lumina muscle memory still works in 80% of situations.